

Hello and welcome! Today I’m sharing a project I created for this week’s Simon Says Stamp Wednesday Challenge. The prompt is “Make Your Own Background” so I figured I’d not only make a background, but also make a tool for making a background! Enter the hot glue gun and the non-stick craft mat.
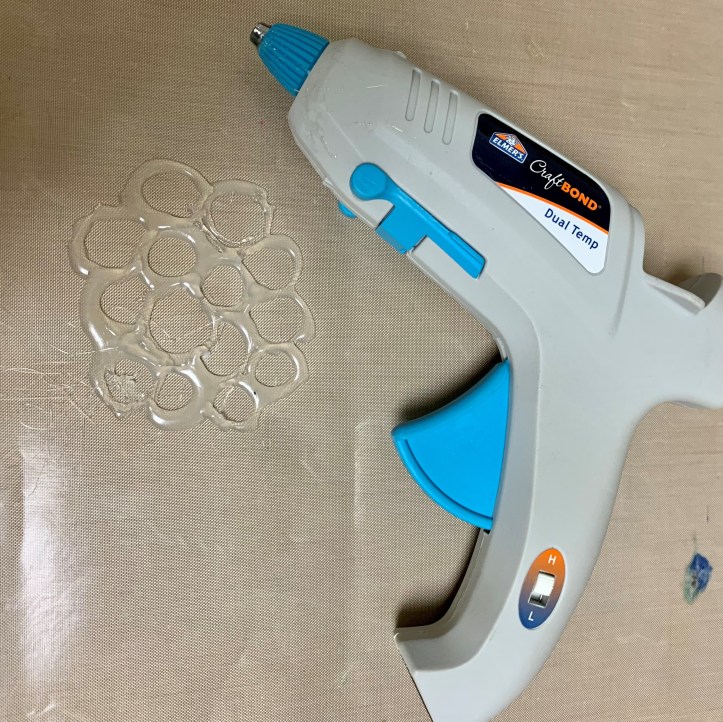
My intention was to make a “bubble” stencil, with circles of varying sizes. I knew the circles would have to connect in order for the stencil to come off the craft mat in one piece, but what I didn’t forsee is that it would be hard to keep the bubbles round AND keep them connected without having thick borders of glue in-between each one (which I really didn’t want).
It turns out that squeezing out uniform patterns with a glue gun is much harder than I thought it would be. The glue came out in a very blobby way, and it was hard to control exactly where it was going to go. I think next time I do this, I’ll try a mini glue gun instead to see if I can have better control and get thinner lines.
If you compare the stencil next to the glue gun to the stencil on the card stock, you can see that I was able to trim up the insides of the circles a little bit by using small craft scissors to cut off the strings and blobs, and cut away some of the really thick borders.
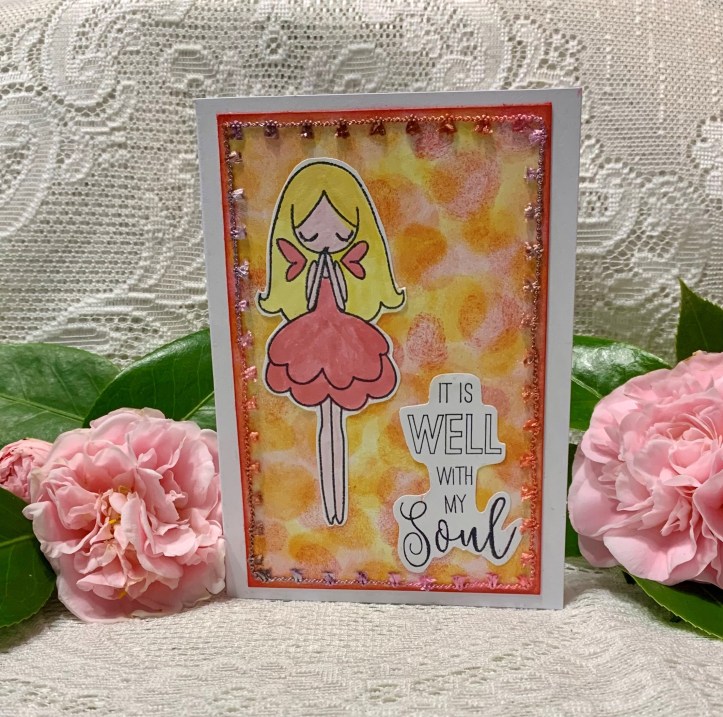
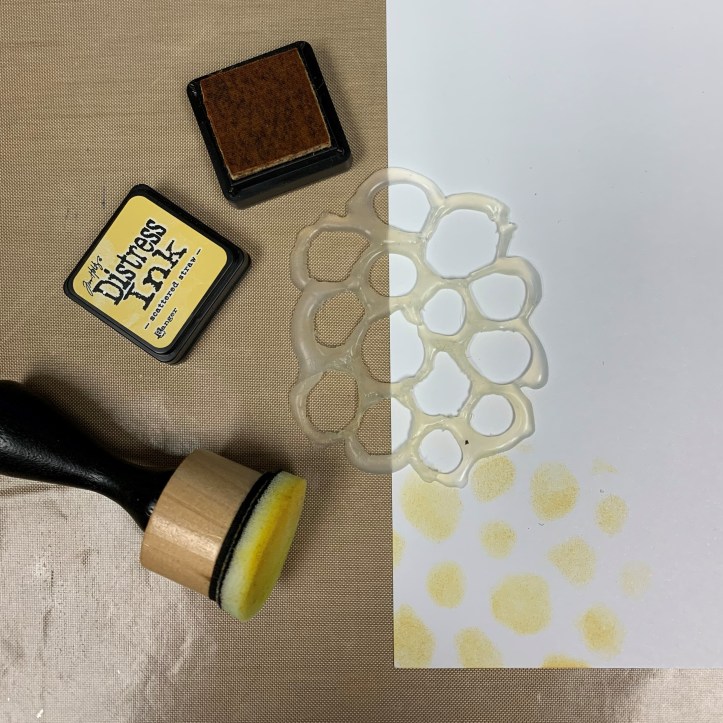
Everyone I see on social media is longing for spring, so I decided to use some bright colors in this project. I chose Tim Holtz distress inks in Scattered Straw, Spiced Marmalade, and Festive Berries, and grabbed my blending tool to lay down the first layer of color. Lo and behold, another thing I realized as soon as I started working is that since a glue gun stencil is not thin and slim (it’s actually plump and thick) it was impossible to get the ink right up to the edges of the holes, so the borders between the inked circles would be even wider than I thought. Bummer.
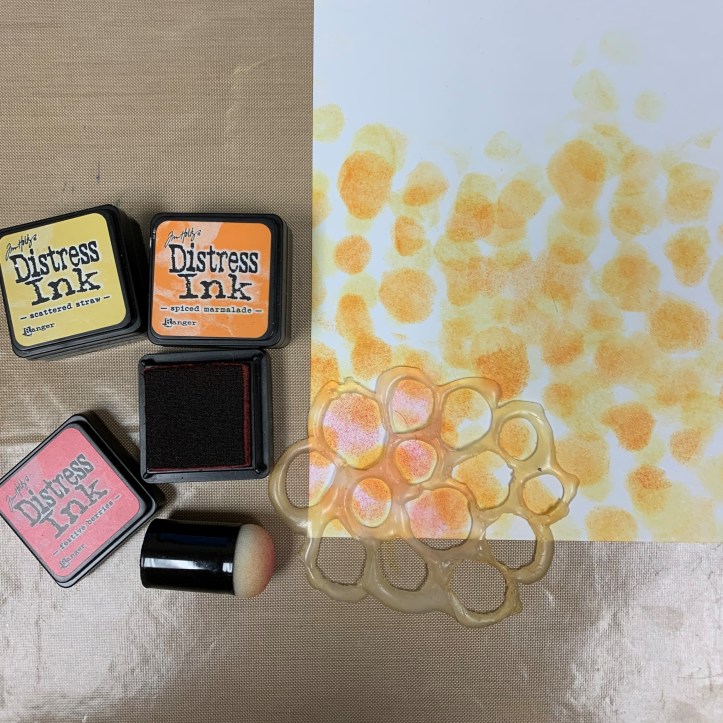
For the next two layers of color I tried a finger sponge dauber, and that did a much better job of getting the ink into the entire opening of each bubble. However, let’s be honest: I’m pretty sure I could have gotten the same background by using JUST the dauber without the stencil. Heck, I probably could have gotten the same background by using my FINGERS without the stencil!
You might have noticed that this project is tagged as (among other things) a FAIL, which stands for First Attempt In Learning. I use this tag when I try something new and it just doesn’t turn out all that great. However, instead of seeing a FAIL as a bad thing, I see it as proof that I’m experimenting and growing as an artist. So even though I was disappointed in this stencil, I have some ideas now for making a better one next time.
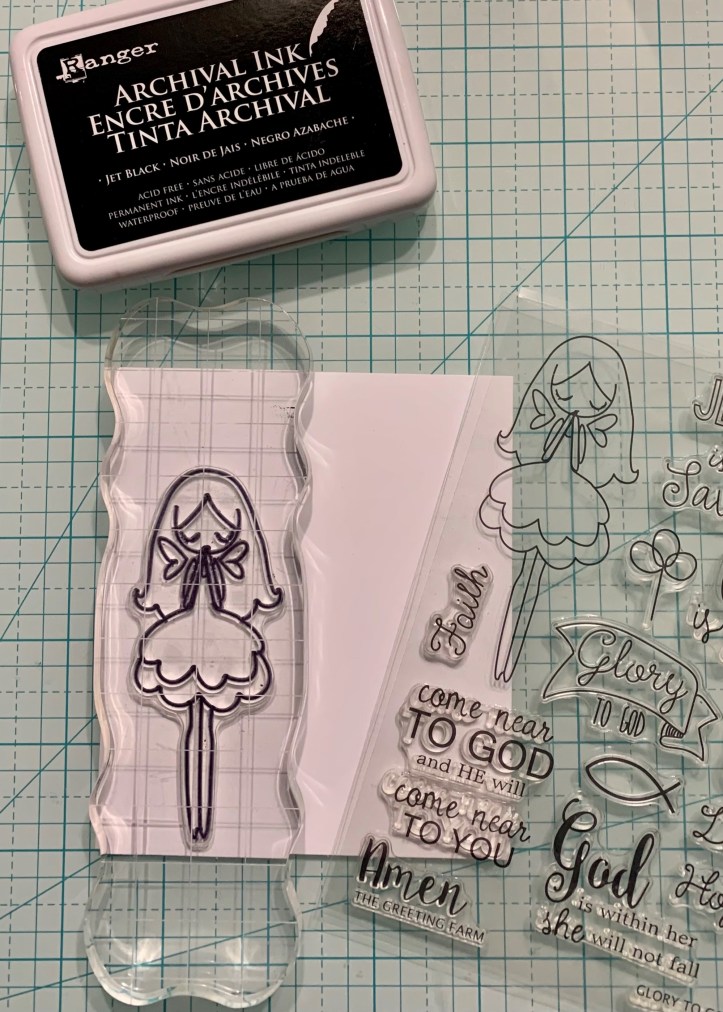
But the background itself turned out fine, so let’s move on to the rest of the project. I stamped my image (the praying girl) and the sentiment onto white paper using Ranger Archival Ink in Jet Black. I used my distress inks to watercolor the girl, and then did some fussy cutting. (Sorry, I forgot to take a photo of the watercoloring.) Another lesson learned: I probably could have left a thicker white border around my cutouts, to give them more contrast against the colorful background.

I cut my background card stock down to fit the front of a blank greeting card, then inked around the edges using Festive Berries distress ink. I used a glue stick to attach the girl and the sentiment to the background, and to attach the background to the card front. For the finishing touch I pulled out this shimmery trim to give it a little pizazz and glued it around the edges with my Tombow Mono Glue, which I absolutely love for delicate little jobs like these.
So there you have it! This homemade stencil was just meh, but the next one will be better. Have you ever created a stencil, a stamp, or some other art tool? I’d love to hear about it in the comments!
Blessings,
~Happy Heart Art Girl

.
.
.
.
.
Note: Some of the links in my posts are affiliate links. As an Amazon Associate I earn a small commission from qualifying purchases at no additional cost to you. I really appreciate your support! xx

[…] Hello and welcome! Today I’m showing you a project made with another stencil I created by using a glue gun, after learning a few things from my first attempt. […]
LikeLike