

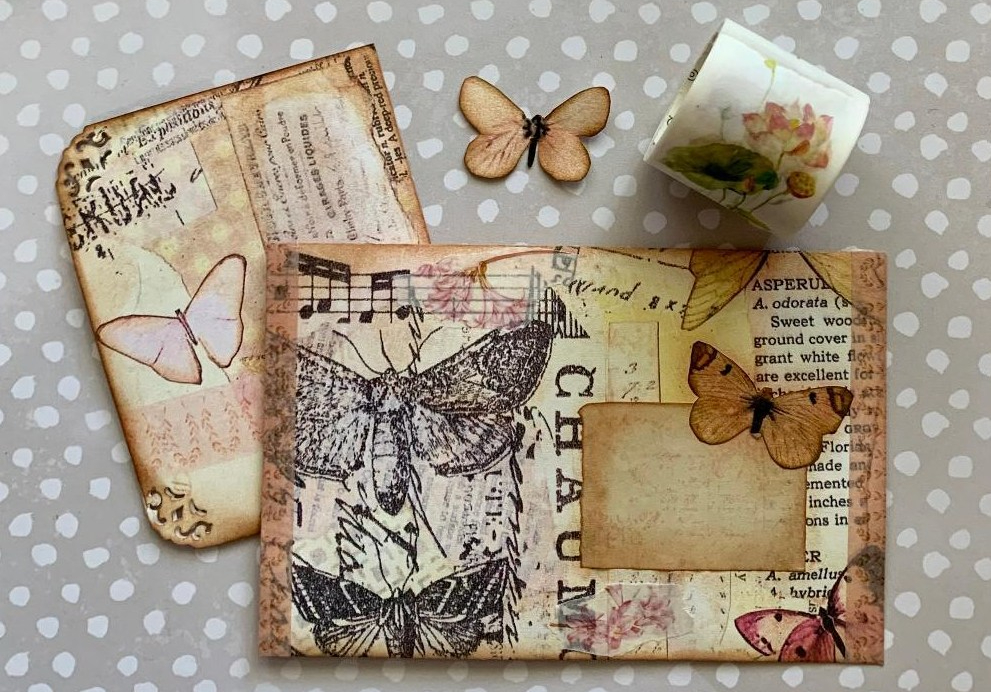
Hello and welcome! In my last post I shared a collage masterboard that I made, and showed you the tags I made from it. If you saw that post, then the above picture may look slightly familiar to you! Here’s the masterboard I created:
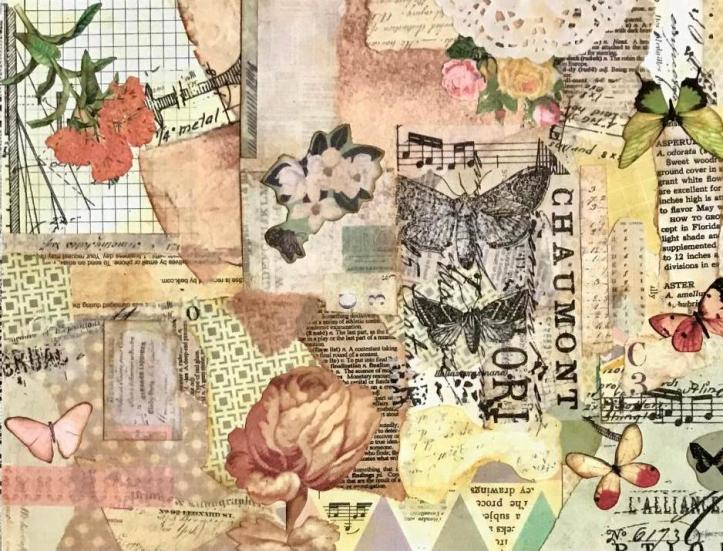
Before making the tags, I scanned it and printed copies of it. I used one of the copies today to create an envelope and notecard to use in a junk journal, pictured at the top of this post.
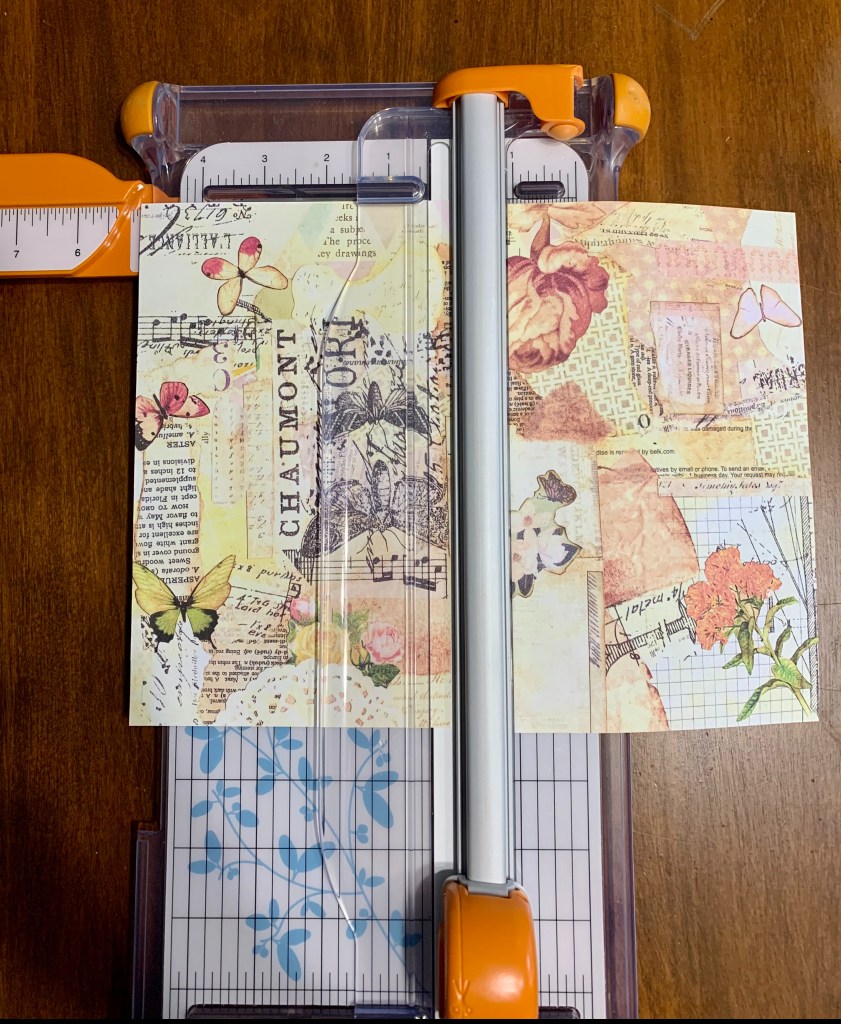
I cut the 8.5×11″ page in half using my paper trimmer. (Note: I had to trim off a small blank border from each edge of the paper first, but you may be able to adjust your printer settings to avoid that on your printouts.)
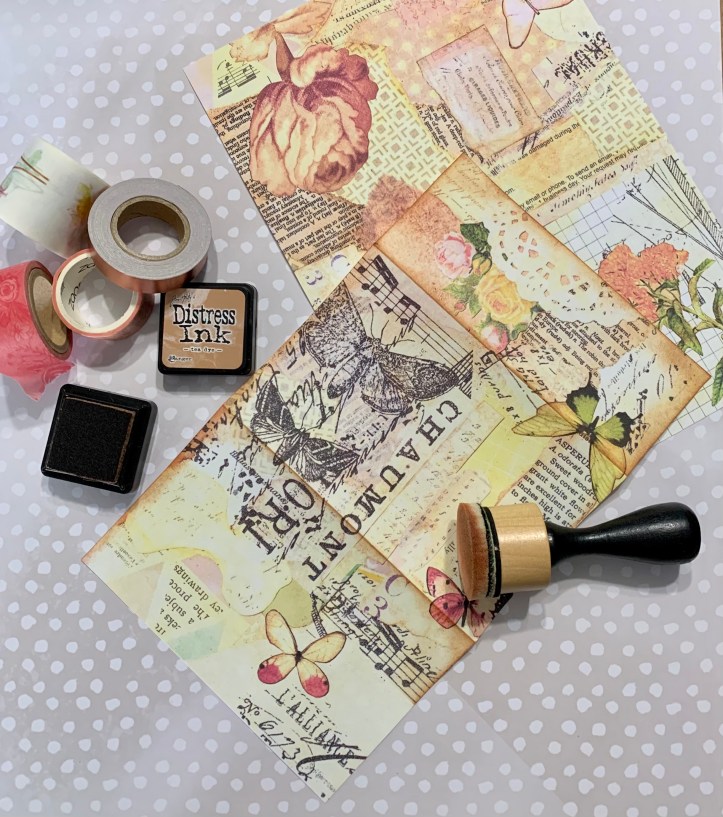
To make the envelope, I simply folded the paper in thirds, inked the edges with some Tim Holtz Tea Dye distress ink. It’s a slightly softer color than his Vintage Photo ink, so I thought it would work better for the colors in this collage.
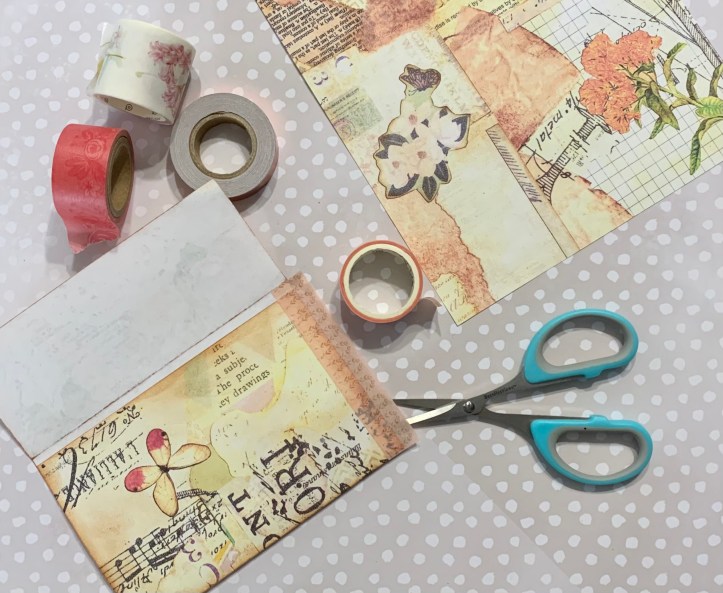
Instead of using glue, I decided to pull out some washi tape to seal the two sides of the envelope. Even though I have a whole container of washi tape, I hardly ever use it because somehow I never feel like I have the right colors! I think I’m just too timid with it, and this year I’m trying to step outside my comfort zone and use my supplies a little more adventurously.
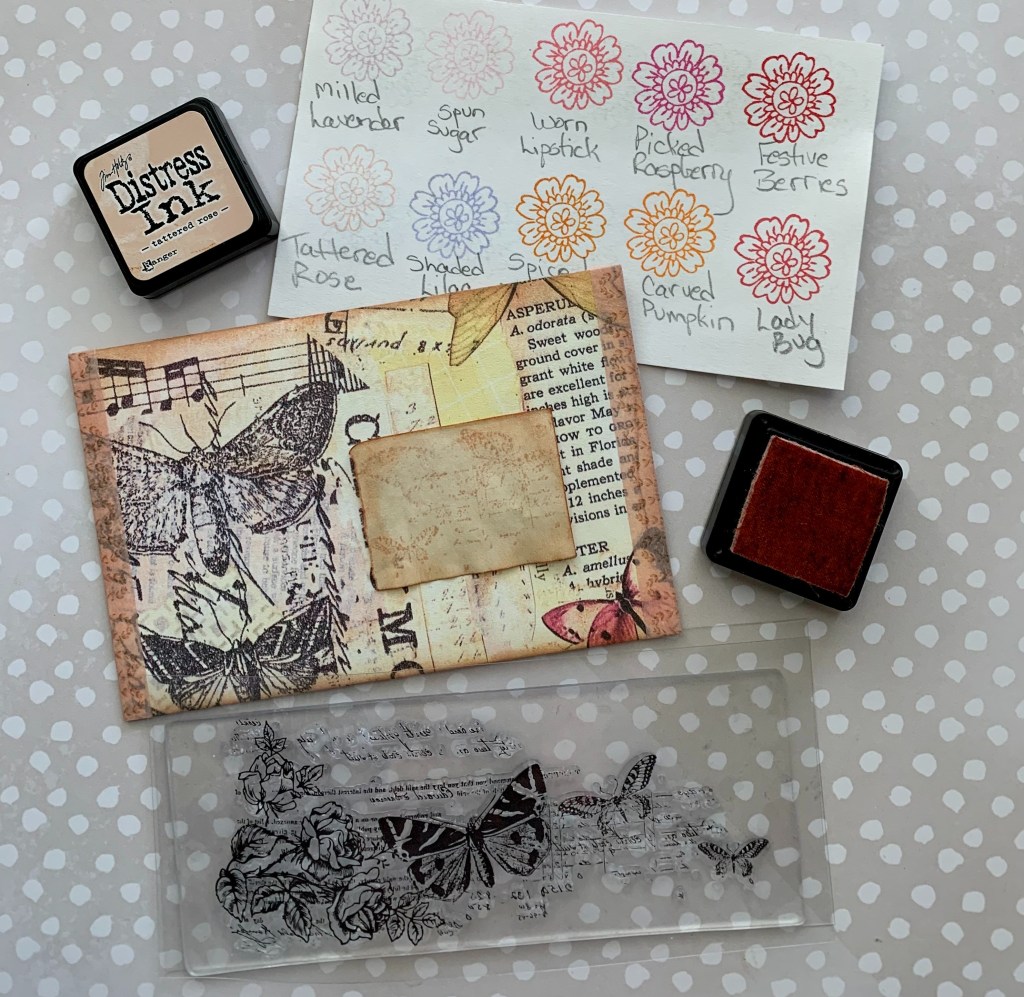
I used a scrap of coffee-dyed paper for a label on the front, and lightly stamped it with a butterfly stamp using the Tea Dye ink to give it some texture. I have swatch cards for my Tim Holtz Distress and Memento Dew Drop inks, and I will often pull them out when choosing ink for a project. In this case, I stuck with the Tea Dye for the whole project.
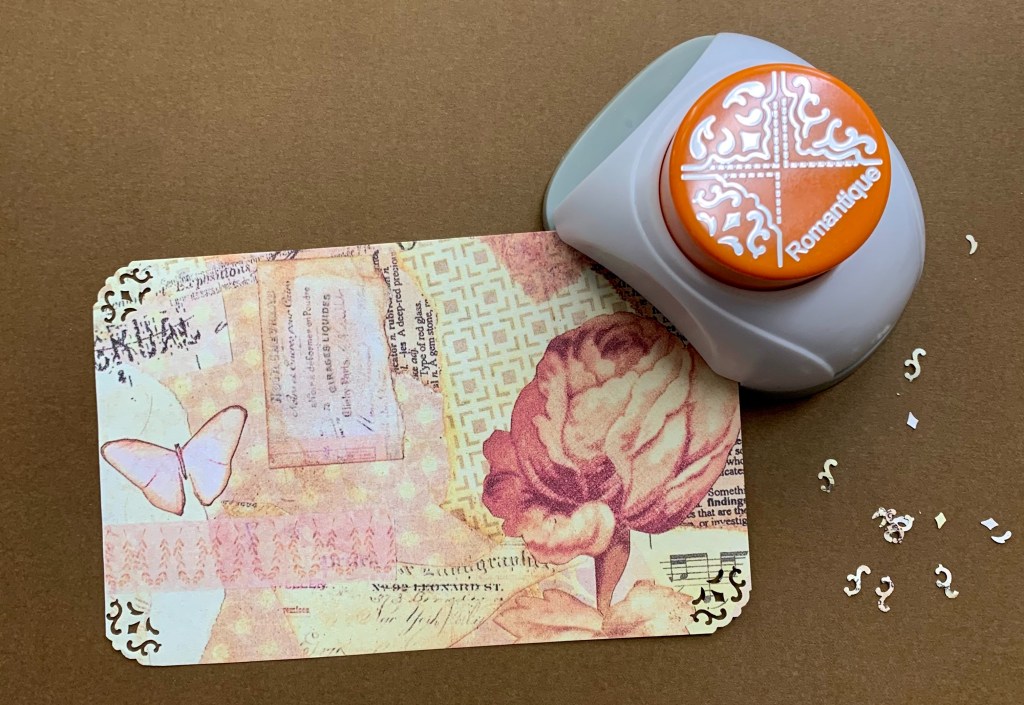
For the journaling card, I trimmed the other half of the masterboard down slightly, used a Fiskars decorative corner punch on it, and inked the edges with Tea Dye ink. Then I folded it in half to make it a notecard.
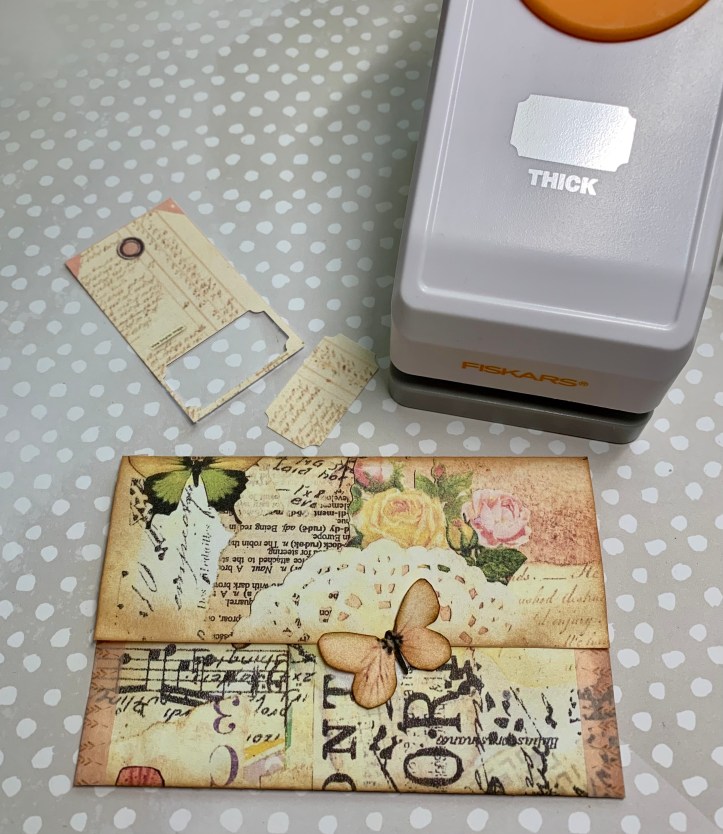
Next I added a closure for the envelope flap. I was going to use just the fussy-cut butterfly you see in the picture above, but it wasn’t quite big enough and I just didn’t feel like printing and cutting another (larger) one. I punched out a little label from some a tag with some script writing on it to use instead with my Fiskars ticket punch.
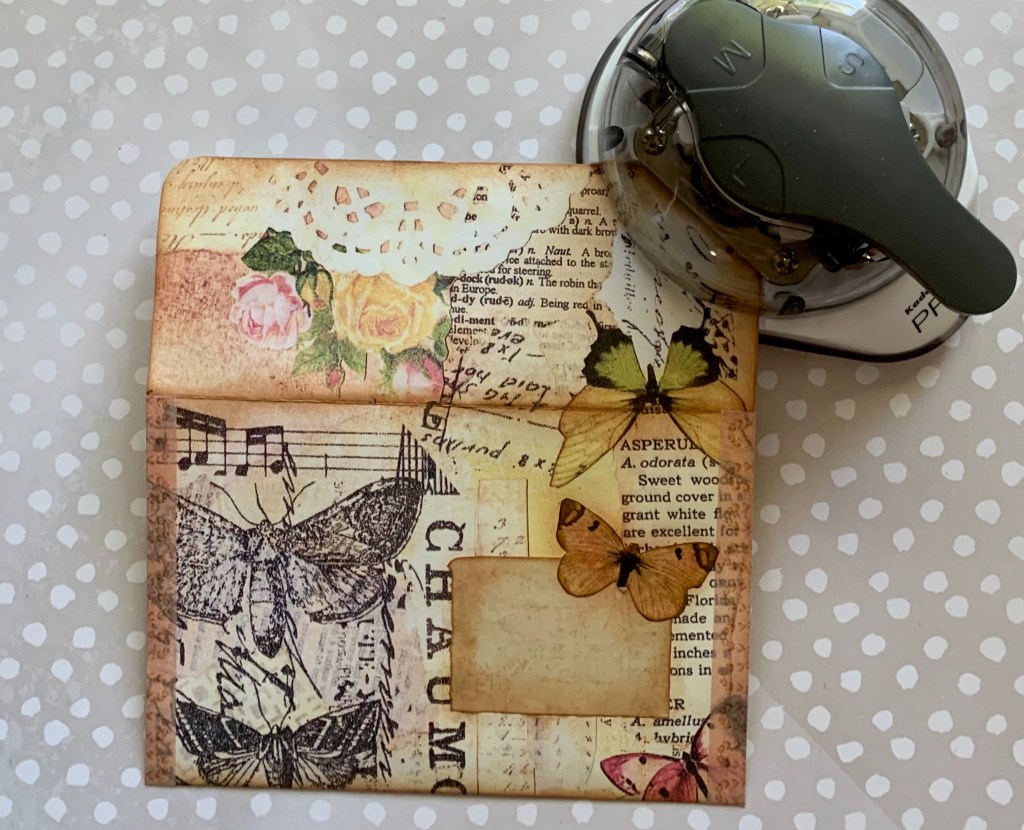
At the last minute I decided to round the corners of the envelope flap with my corner rounder, which I LOVE! It’s an off brand, but this one tool has a small, medium, or large slot and it gives a clean punch every time. It’s one of the best craft purchases I’ve ever made! Anyway, I think it gives the envelope a more finished look.
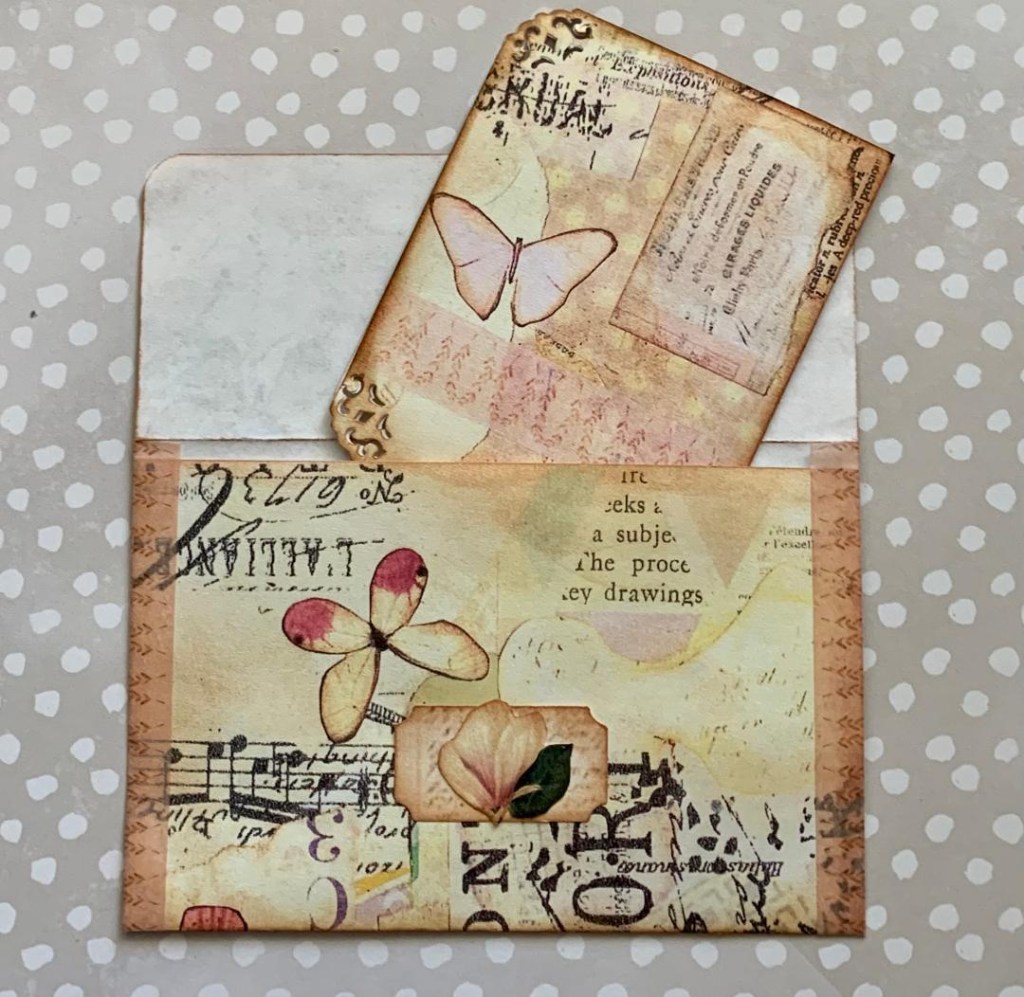
I was going to glue the butterfly to the label, but when I lifted the envelop flap I realized there was already a butterfly right by the closure spot so I fussy cut a flower to use instead. I kind of like that the monochrome colors don’t compete with the magenta on the collaged butterfly.
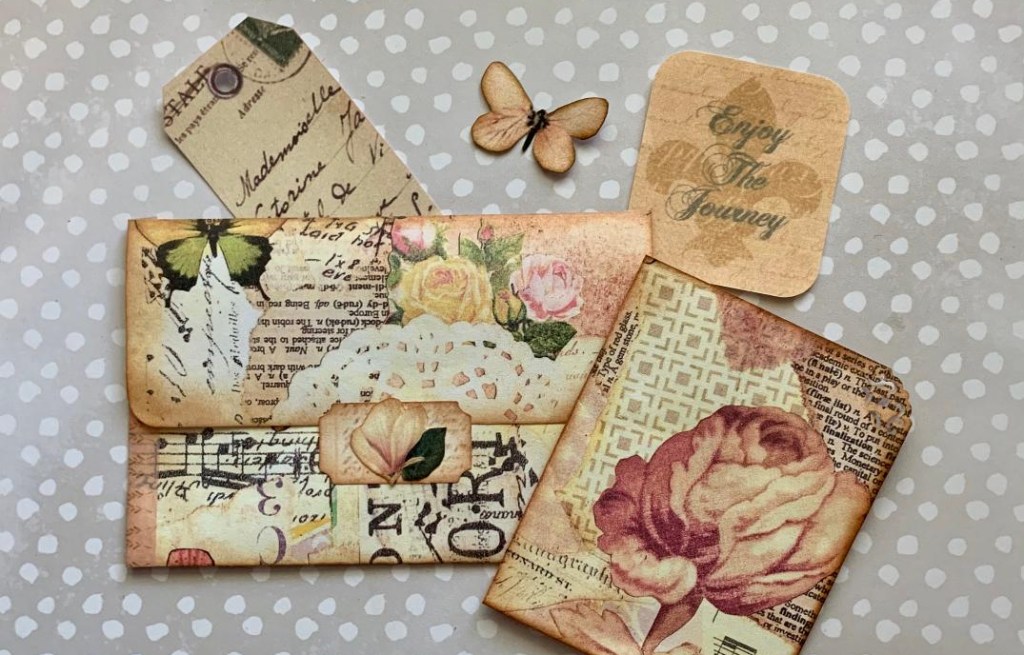
Of course I only put glue on the bottom half of the closure label so that the flap of the envelope can tuck behind it. I also pulled out a couple more things to go inside the envelope along with the journaling notecard.

Finally, I added two more spots of color to the front of the envelope with some floral washi tape, and glued a fussy-cut butterfly to the top corner of the label. I actually could have continued doing more embellishing, but there comes a point when you have to tell yourself enough is enough!
So that’s another use for my vintage collaged masterboard, which I’m offering as a free printable for my readers. Just click to download a PDF file that you can print and use for your own projects. I’d love to see what you create, so please tag me on Instagram or Facebook if you post any photos of your project!
Blessings!.
~Happy Heart Art Girl

Thank you for stopping by!
.
.
.
.
Note: Some of the links in my posts are affiliate links. As an Amazon Associate I earn a small commission from qualifying purchases at no additional cost to you. I really appreciate your support! xx

[…] shared a couple of other projects I made from that masterboard (some mixed media tags and an envelope and notecard), and this is the third example of something you can do with it. If you’d like a copy to play […]
LikeLike