

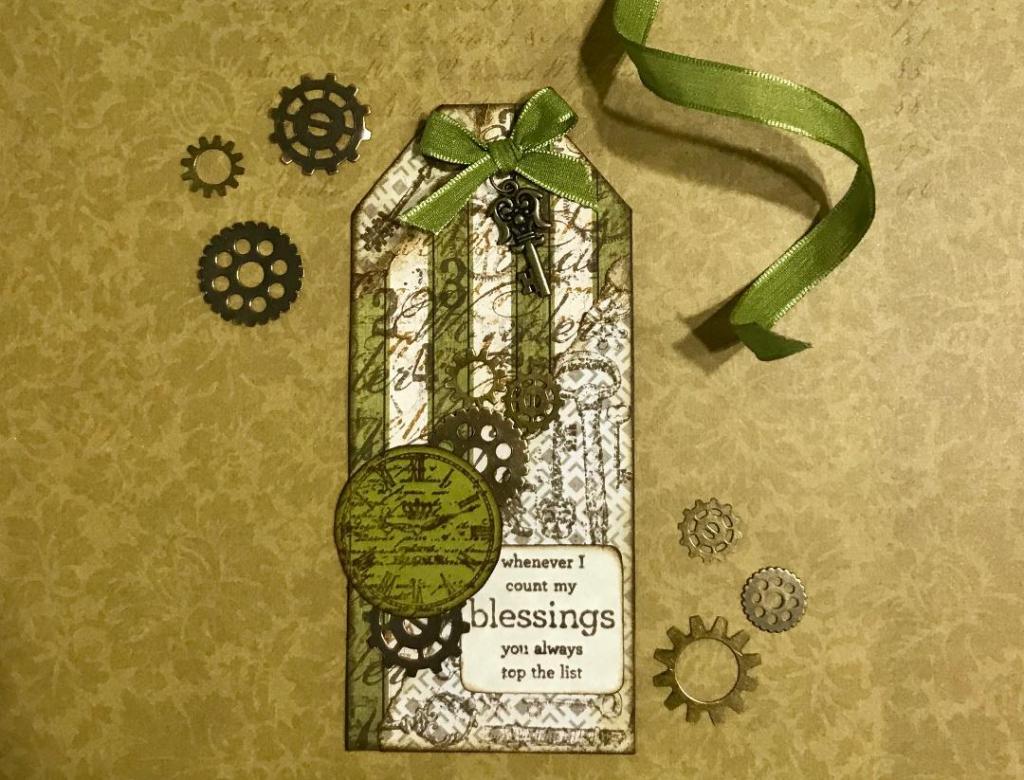
Today’s project is an art tag, one of my favorite types of project. I like having a small space to work with; large blank surfaces still intimidate me! This project is a gift for a man who was born an old soul, so I wanted to use masculine colors and vintage accent pieces on it.

I cut the tag from a piece of Neenah 90 pound Ivory Card Stock. (Note: If ordering online be aware that “Ivory” in this case is more the color of a manilla file folder, which is what I wanted as it’s the same color as the pre-cut tags sold in craft stores. Also be aware that it’s super-smooth and offers a nice surface for blending inks as well as for gluing on craft paper.) I realized after I took this picture that the corners of the tag weren’t cut evenly, so I had to go back and trim it up with my rotary paper cutter. The background paper is from a Glitz Joyeux Noel 6×6 paper pad..
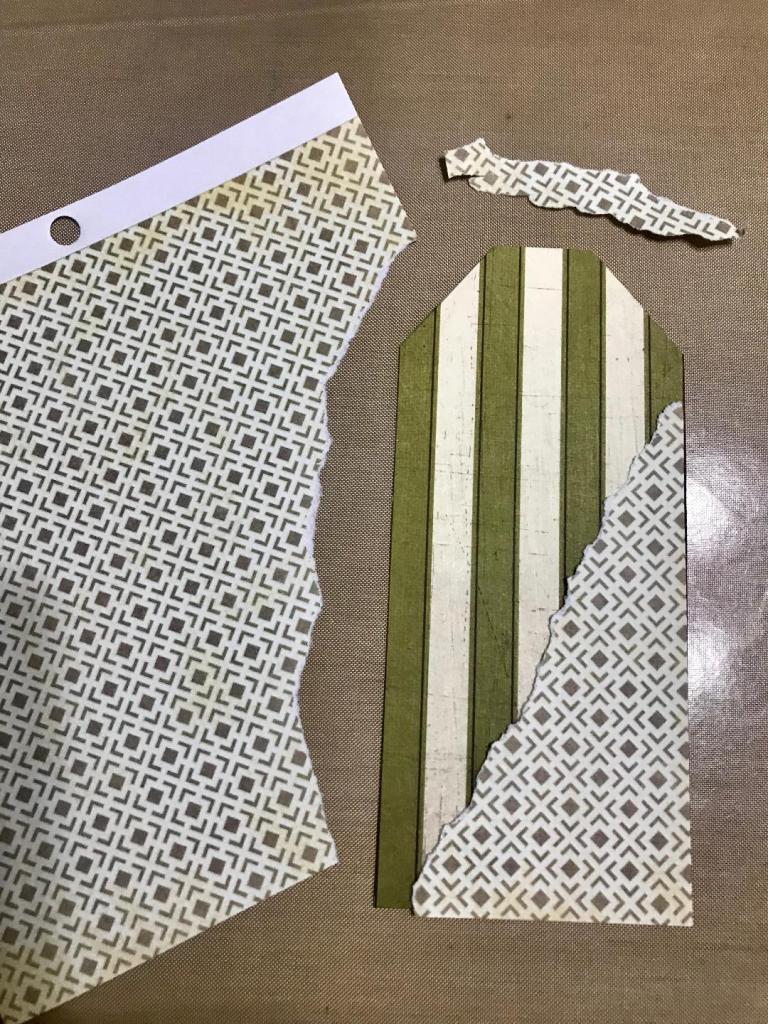
The vintage-looking accent paper I chose is from a Recollections 6×6 paper pad, which I like because it’s full of neutral colors and patterns. I just ripped off a couple of pieces to glue onto the tag background.
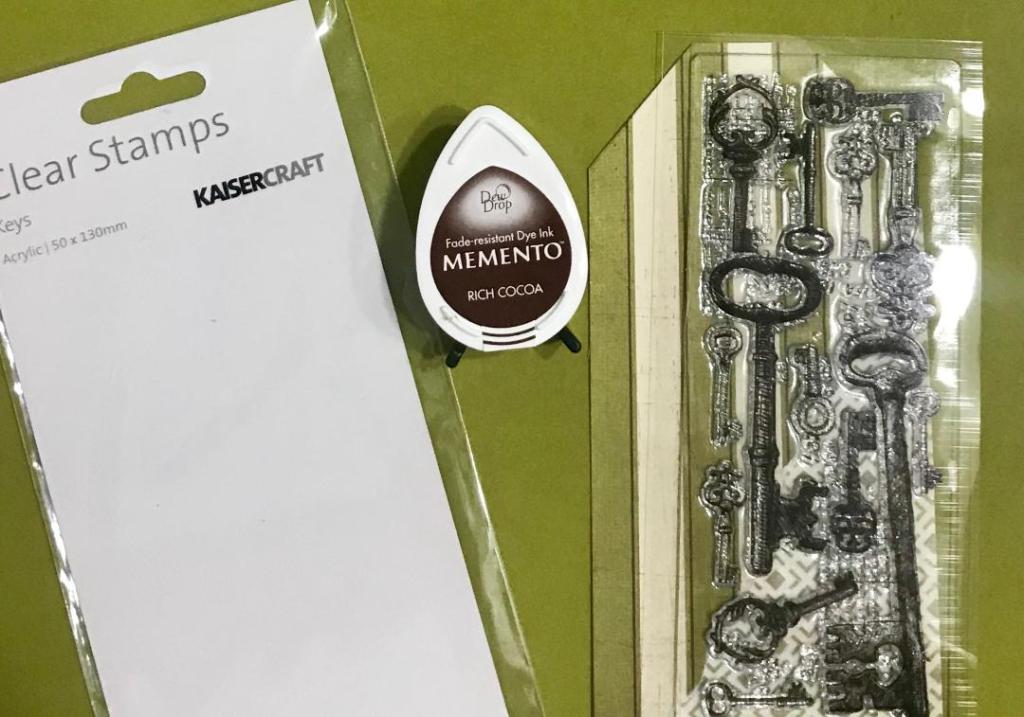
I used a Keys Stamp from the Kaiser Craft Enchanted Clear Stamps collection to stamp the accent paper using Memento Ink in Rich Cocoa. This stamp is great because you can ink the whole thing or just the keys you want to use.

Before gluing down the stamped accent paper with a permanent glue stick, I inked the edges with Tim Holtz Distress Ink is Walnut Stain. I often use Vintage Photo for inking edges, but because of the darkness of the lines in the background paper I wanted something dark (but not black) on the paper edges.
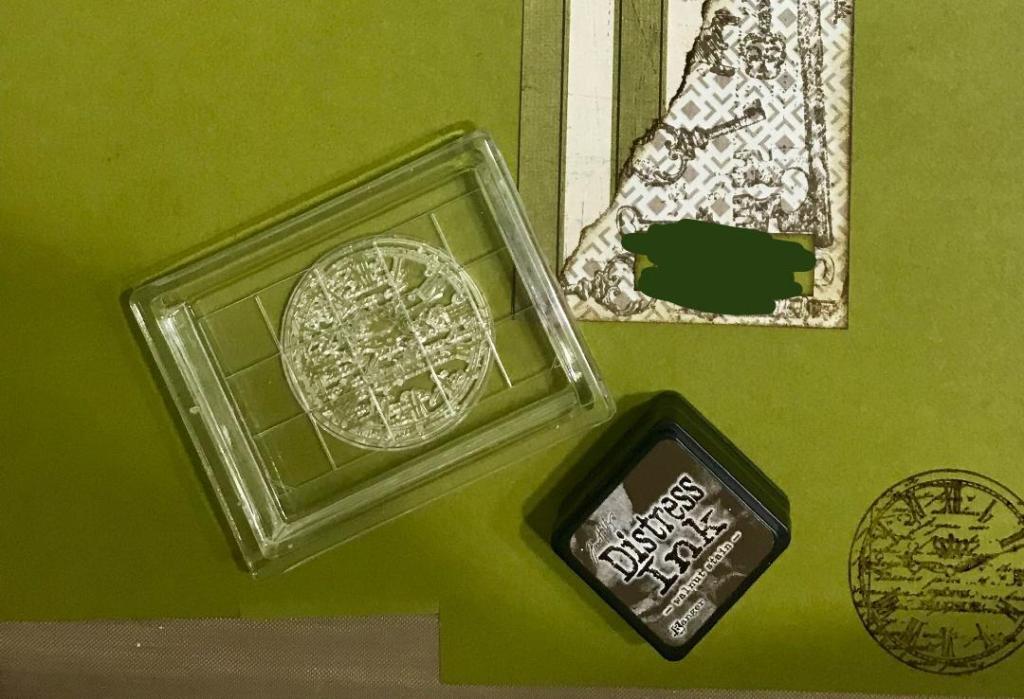
I chose this clock face from the Vintage Things stamp set for my focal image. I stamped it onto a piece of olive green cardstock from the Recollections Spice Collection (which by the way has the perfect colors for fall crafting) using Walnut Stain Distress Ink and then cut it out with my no-name “fussy cutting” scissors. I would love to upgrade to a better pair of scissors, so if you have a favorite that you use please share it in the comments! (As you can see, I originally planned on having a different sentiment on this stamp but I later changed my mind. Luckily I hadn’t glued it down yet!)
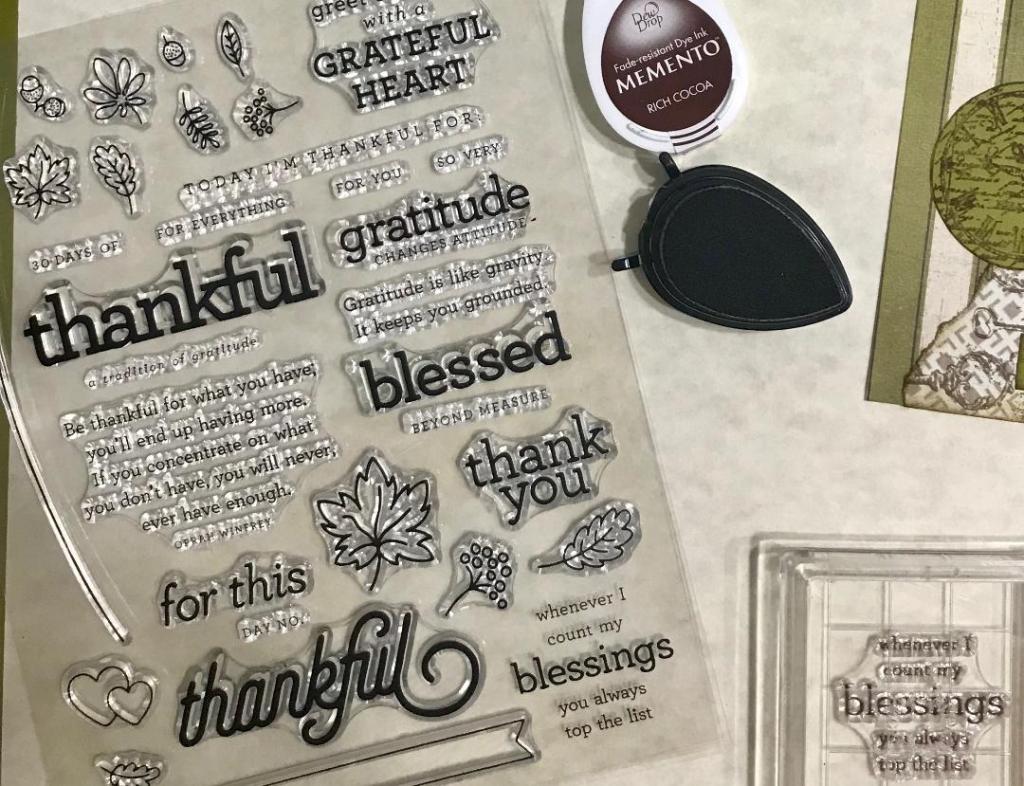
I stamped my sentiment onto a piece of Neenah Astroparche parchment paper with Memento Ink in Rich Cocoa. This Thankful stamp set can be used so many different ways, and the price is unbelievable!

I used my corner rounder punch on the sentiment before I inked the edges to give it a more finished look. This corner rounder is SO easy to use, even on card stock, and it offers a choice of Small, Medium, or Large corners. I highly recommend it!!
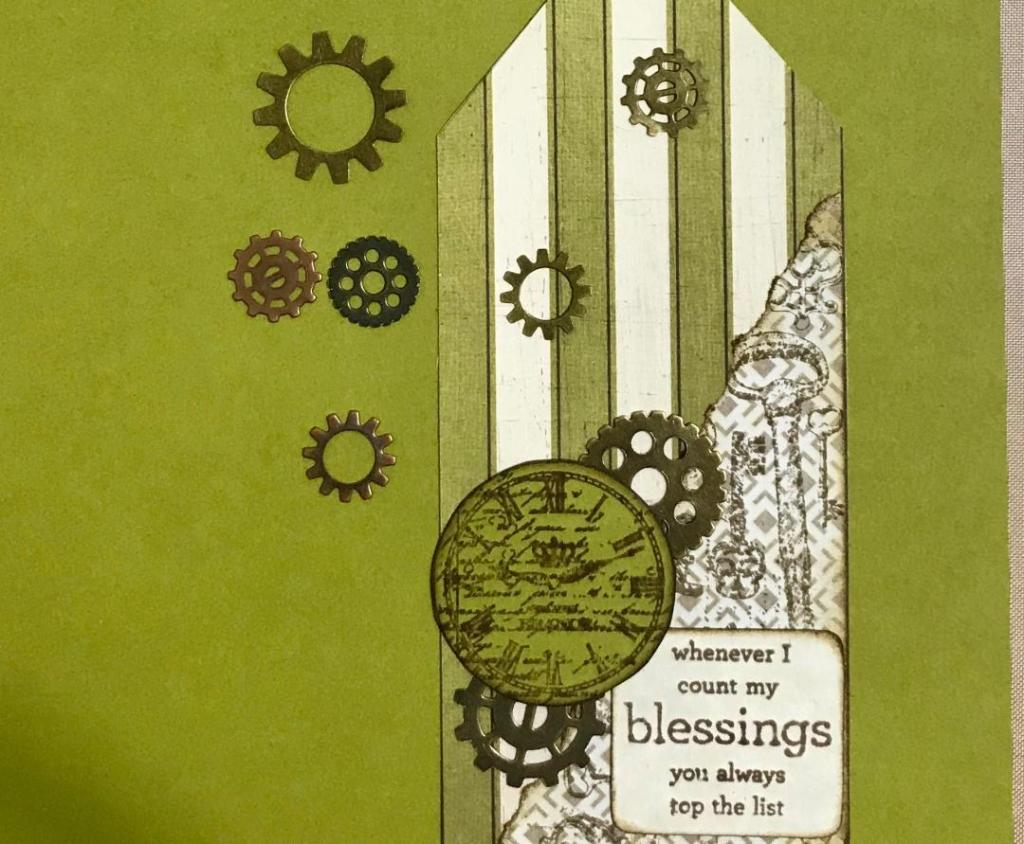
I wanted to add some more dimension to the tag, so I pulled out my collection of small metal gears and played around with an arrangement that would work with the clock face.
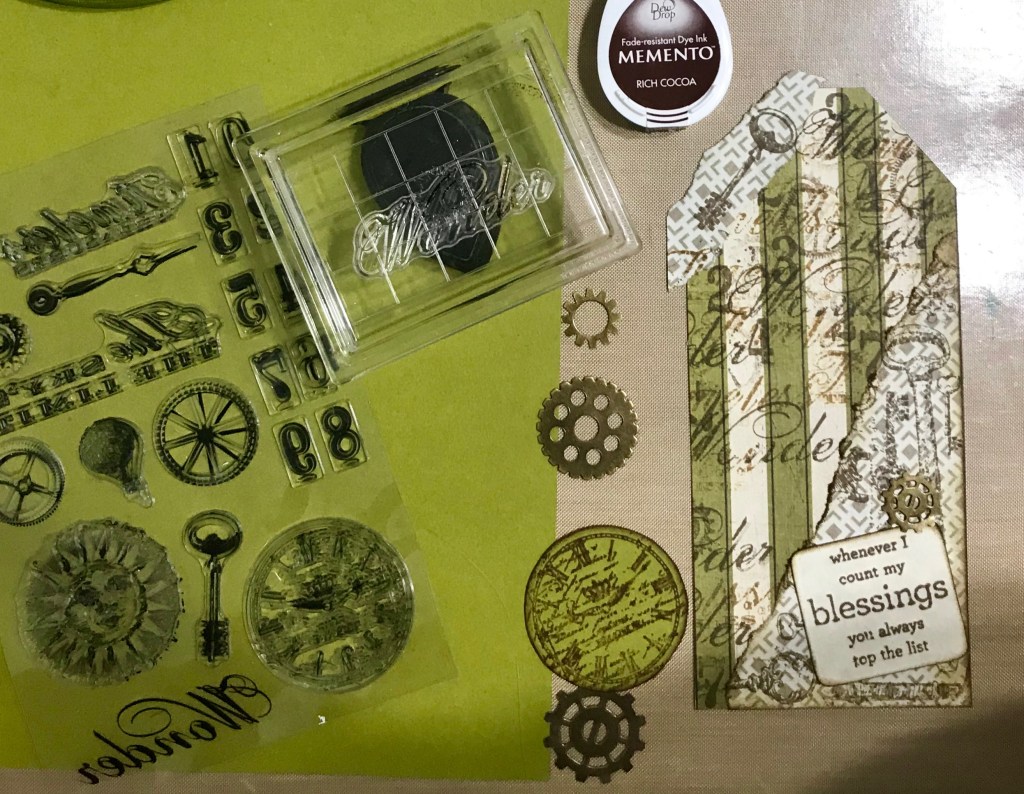
In order to add some interest to the green stripe background, I stamped on some script, gears, and numbers from the same Vintage Things stamp set as the clock. That’s the nice thing about stamp sets; all the stamps usually work well together. I used both Memento Ink in Rich Cocoa and Tim Holtz Distress Ink in Brushed Corduroy for the stamping to give the color palette some variation. I may have gone a little overboard with the stamping here; I think less might have been more in this case.
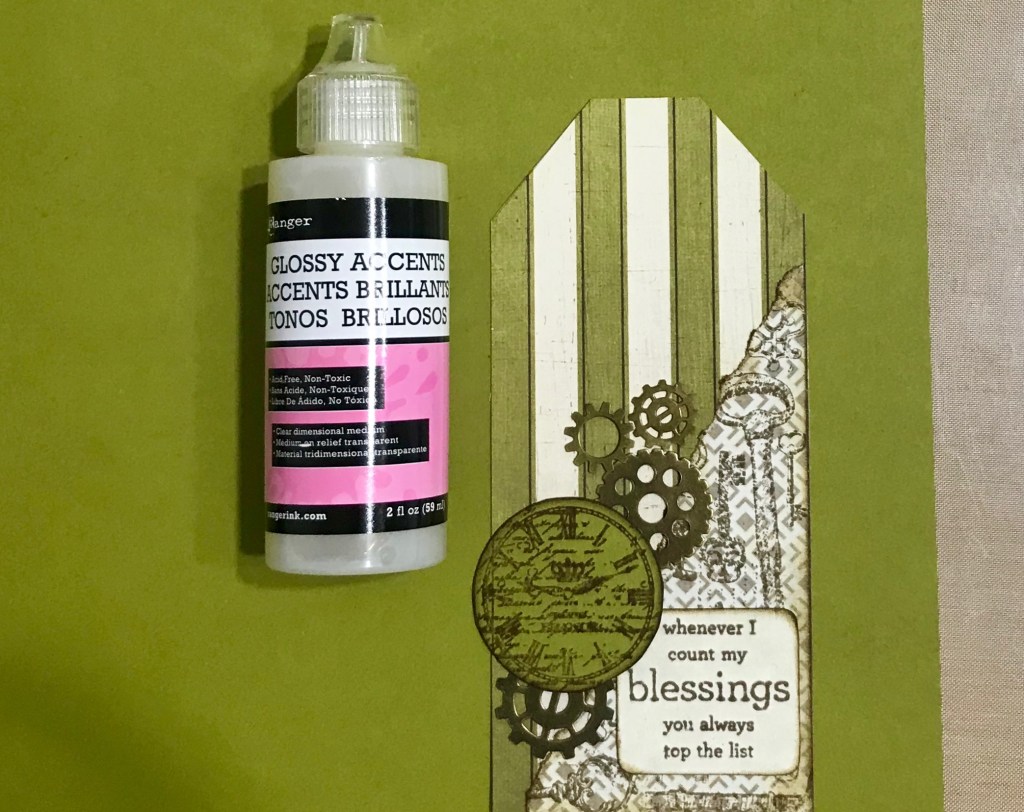
I took this photo out of order, but after I stamped the background I used Glossy Accents to attach the metal gears to the tag. Glossy Accents is the perfect medium for this because the tip is super thin so you can put tiny dots of glue exactly where you need them, and it forms a permanent bond with fairly quick drying time. And because you only need to use just a little of it, a small bottle will last a loooong time.

Once everything was glued on, I inked all around the edges of the tag with Walnut Stain Distress Ink. Then I punched a couple of holes in the top of the tag for the ribbon. (Yes, I measured. I’m that person.) Sometimes I just punch one hole, but this time I wanted to thread the ribbon through and tie it in a bow because the top of the tag was looking a little bare.

I had this moss green ribbon on hand from another project, and I thought it was a perfect match for this tag. I also wanted to add a metal key charm to coordinate with the stamped keys. The key I used is a little more ornate than I would have liked, but my plainer keys were either silver or copper colored, which didn’t go as well with the color of the gears. Overall though I’m happy with the way it turned out.
Don’t forget to tell me about your favorite “fussy cutting” scissors in the comments!
Blessings,
~Happy Heart Art Girl
Note: This post contains affiliate links. If you make a purchase through one of these links, I receive a small percentage of the sale (at no additional cost to you) which I use to purchase more craft supplies. Thank you for supporting my creativity!
